I had a fantastic opportunity to speak at the Walt Disney Parks & Resort (WDPR) Dev Days today. What a great experience!!
As promised, here’s the complete Slide Deck.
I hope everyone enjoyed the event as much as I did!!

Jim Wilson (a.k.a. hedgehogjim)
30+ years as a professional software dev, 17+ years developing mobile solutions, Pluralsight Author, Founder JWHH, LLC
I had a fantastic opportunity to speak at the Walt Disney Parks & Resort (WDPR) Dev Days today. What a great experience!!
As promised, here’s the complete Slide Deck.
I hope everyone enjoyed the event as much as I did!!
Activities in Android/Xamarin.Android are far more than just screens. They are a first-class component of the Android runtime with a distinct lifecycle. An important aspect of that lifecycle is how the Activity behaves when your app transitions away from an Activity and then returns to it.
When a user leaves an Activity (we’ll call it Activity-A) to view another Activity, sometimes the Android runtime will simply move Activity-A into the background, in other cases the runtime may destroy Activity-A. When the user returns to Activity-A, if its still running in the background, the runtime simply moves it into the foreground. But … if it was destroyed, the system creates a brand new instance of Activity-A and as developers we’re responsible to be sure that Activity-A is restored to the same state it was in when the user left it.
In other words, it’s our job to put the magic together that creates the illusion that Activity-A has been waiting patiently for the user to return even if that’s not actually the case.
Managing this lifetime correctly can be a bit of a challenge. It means that the state of every member variable must be persisted (normally stored by your Activity’s OnSaveInstanceState method) and then restored (normally handled in your Activity’s OnCreate and/or OnRestoreInstanceState methods). Restoring the Activity means that we must also assure that all of the behaviors dependent on those member variables are restored as well.
When developing and testing our apps, generally the only thing the test device is doing is running our app. This avoids many of the issues (depleting system resources, etc.) that cause the system to destroy an Activity when the user moves away from that Activity. The result is that we end up testing only the most simple case of our application … the Activity being initially created and then continuing to exist until we’re done with it.
However, when our app goes out into the field, it’s facing a much harsher environment. Our real-life users may have many different things running on their phones or maybe they’re using a phone with much more limited resources then our test phones. The in-the-field scenarios significantly increase the likelihood that an Activity will be destroyed when the user moves away from it and then fully recreated when the user returns.
This results in the app encountering scenarios in the field that we may have never experienced during our app development and testing.
To assure that our apps work correctly in scenarios where the Activities are destroyed and restored, we must be sure to include that behavior in our app testing.
Under normal Android behavior, testing this case is difficult because keeping or destroying an Activity is something that occurs at the discretion of the Android runtime … what we need to do is get around this normal behavior of the Android runtime.
We need to force the runtime to kill our Activities when we move away from them so that we can verify that our Activities restore themselves correctly.
Fortunately, Android provides a series of Developer Options that allow us to alter the behavior of the Android runtime during our app testing. One of those options is “Don’t keep activities”.
As it’s name implies, when set, the runtime does not keep Activities running when the user moves away from them instead Activities are always destroyed.
To access this option, open up your device settings and locate “Developer options”. You’ll probably have to scroll pretty far down to find it.
BTW: Some 4.x versions of Android hide “Developer options” by default. See this post for instructions for unhiding it.

Once your’re in the list of Developer Options, scroll down until you find “Don’t keep activities” (it’ll probably be near the end of the list of options). Select the check mark next to it to enable the option.

With the “Don’t keep activities” option enabled, you can now fully test your Activities. Every time you move away from an Activity, it will be destroyed. When you return to the Activity, it will then go through its full restoration cycle. You’re now able to consistently test the most challenging part of the Activity life cycle.
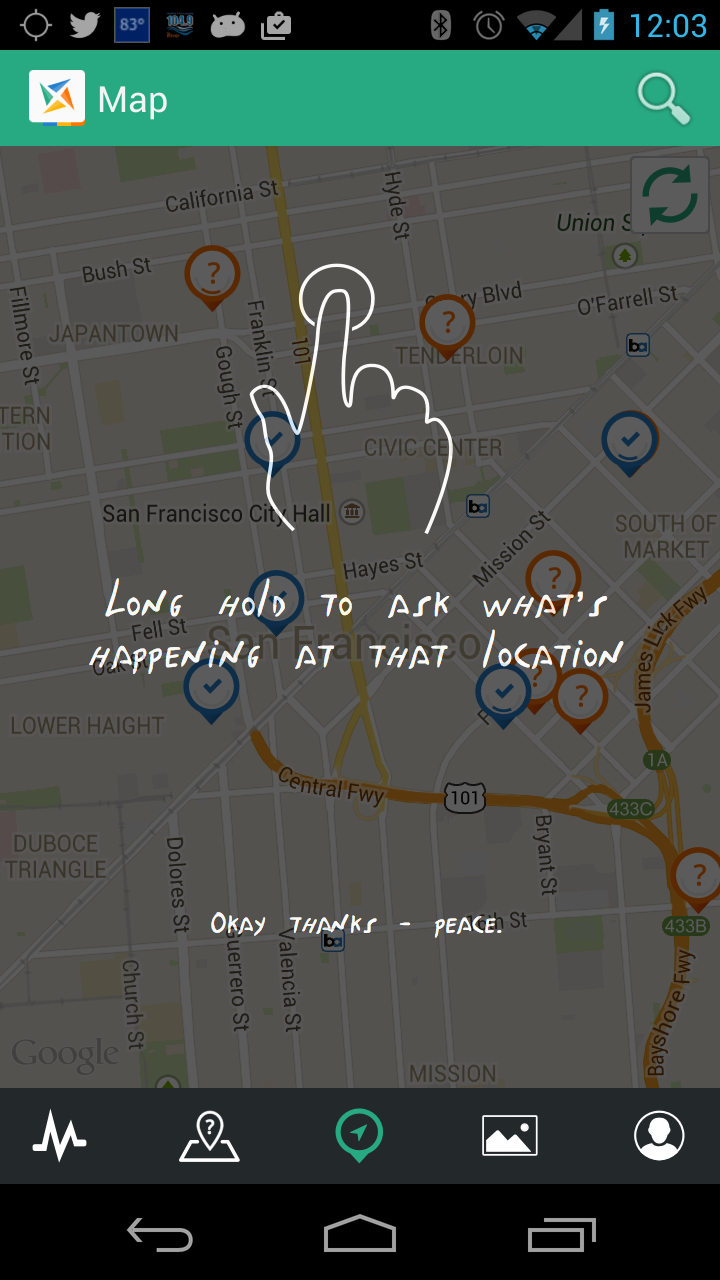
Making use of the “Don’t keep activities” option during our testing has been a key part of how we assure that our Spectafy app remains stable in the field. Our users are highly diverse using a wide variety of phones. With the rich nature (maps, lots of images, complex data model) of many of our screens (Here’s just a few of them)…

… we need to be sure that each Activity provides that consistent, stable experience in all scenarios.
To that end, we regularly exercise our app with the “Don’t keep activities” option enabled. This practice allows us to be sure that each Activity correctly restores itself and provides our users with an uninterrupted, stable experience.
I encourage you to incorporate “Don’t keep activities” as regular part of your Xamarin.Android development and testing. (BTW: this option is equally useful for Java-based Android development as well). It’ll make a big difference in the field stability of your apps and help you avoid having to deal with a lot of painful I-can’t-reproduce-the-problem debugging headaches.
The Xamarin.Auth component is a huge time saver when interacting with services like Twitter and others that require authentication. In most cases, Xamarin.Auth makes authentication as simple as initializing an authenticator and then dealing with success or failure.
As an example, here’s the code to do Twitter authentication with Xamarin.Auth
void DoMyTwitterAuth()
{
  var auth = new OAuth1Authenticator(
    Constants.TwitterConsumerKey,
    Constants.TwitterConsumerSecret,
    new Uri("https://api.twitter.com/oauth/request_token"),
    new Uri("https://api.twitter.com/oauth/authorize"),
    new Uri("https://api.twitter.com/oauth/access_token"),
    new Uri("http://twitter.com"));

  auth.Completed += (sender, e) =>
  {
    if(e.IsAuthenticated)
    {
      var account = e.Account;
      // Do success work
    }
 };

  auth.Error += (sender, e) =>
  {
    // Do Error work
  };

  // iOS
  var ui = auth.GetUI();
  PresentViewController(UI, true, null);
  // Android
  //var ui = auth.GetUI(this);
  //StartActivity(UI)
}
Authenticating against any remote service requires communicating over the Internet which, of course, involves an indeterminate time delay. As a result, the auth.Completed or auth.Error event handlers get called asynchronously after some significant (in computer terms) delay.
We know that writing apps that use traditional asynchronous techniques can be complicated. To deal with this scenario, .NET provides the Task<T> class along with the async and await keywords. With these tools we get to code things using traditional linear programming techniques leaving the asynchronous details to .NET.
If authentication was setup to use Task<T> we could write our authentication code something like this.
async void DoMyTwitterAuth()
{
  try
  {
    var account = await AuthHelper.OAuth1(
      Constants.TwitterConsumerKey,
      Constants.TwitterConsumerSecret,
      new Uri("https://api.twitter.com/oauth/request_token"),
      new Uri("https://api.twitter.com/oauth/authorize"),
      new Uri("https://api.twitter.com/oauth/access_token"),
      new Uri("http://twitter.com"));

    // Do success work
  }
  catch (Exception ex)
  {
    // Do error work
  }
}
That is so much simpler to work with than having to explicitly handle the callbacks in separate methods or lambda expressions.
The problem, of course, is that Xamarin.Auth doesn’t support that async/await programming style.
We can code up an AuthHelper.OAuth1 implementation that translates the Xamarin.Auth callbacks into Task<T> that’ll allow us to use async/await.
Here’s the OAuth1 implementation…
using Xamarin.Auth;
using System.Threading.Tasks;
// other usings elided for clarity

static class AuthHelper
{
  public static Task<Account>OAuth1(
      string consumerKey, string consumerSecret,
      Uri requestTokenUrl, Uri authorizeUrl,
      Uri accessTokenUrl, Uri callbackUrl)
  {
    TaskCompletionSource<Account> tcs =
       new TaskCompletionSource<Account>();

    var auth = new OAuth1Authenticator(
        consumerKey, consumerSecret, requestTokenUrl,
         authorizerl, accessTokenUrl, callbackUrl);

    auth.Completed += (sender, e) =>
    {
      tcs.SetResult(e.IsAuthenticated ?
          e.Account : null);
    };

    auth.Error += (sender, e) =>
    {
      tcs.SetException(e.Exception);
    };

    // iOS
    var ui = auth.GetUI();
    someViewController.PresentViewController(ui, true, null);
    // Android
    //var ui = auth.GetUI(someActivity);
    //someActivity.StartActivity(ui);

    return tcs.Task;
  }
}
With that little helper method, we can now do our authentication code using a simple linear programming style with the help of async/await.
try
{
  var account = await AuthHelper.OAuth1(...);
  // do success work
}
catch(Exception ex);
  // do error work
}
The key to making this work is the TaskCompletionSource. It allows us to easily translate non-Task style asynchronous work to Task-style. Basically it creates a Task<T> instance that can be await’ed on. When the work completes we call the SetResult or SetException methods and the TaskCompletionSource handles the Task signalling details.
We use this technique at Spectafy and it has made our Xamarin.Auth programming so much easier.
Mobile networking introduces connectivity challenges that don’t generally exist in more traditional server-based or desktop-based development. Sure iOS, Android, and Windows Phone provide APIs for checking network availability (I talked about some of the Android network APIs in this discussion of network-based locates) but those APIs don’t tell the whole story.
Often times when working on a mobile device, the Network APIs will report that all is well but a given network call fails anyway (can’t reach host, error reading return value, etc.) … in these cases, often a simple retry will result in a successful call. This can happen anytime with any method call that relies on the network.
What that means is that we need to surround every network call with exception handling and retry logic. With that being the case, a simple call like this…
var byteArray = await
  new HttpClient().GetByteArrayAsync("https://jwhh.com/HedgeHog.gif");
Has to get quite a bit more involved. To make the above call automatically retry in the event of a failure … that simple line of code becomes something like this…
const int MaxTries = 2;
bool success = false;
int tryCnt = 0;
byte[] byteArray;
while(!success && tryCnt++ < MaxTries)
{
  try
  {
    byteArray = await
      new HttpClient().GetByteArrayAsync("https://jwhh.com/HedgeHog.gif");
    success = true;
  }
  catch(Exception ex)
  {
    if(tryCnt < MaxTries)
      Debug.WriteLine("Retrying after error: " ex.Message);
    else
      Debug.WriteLine("Not retrying -  error:" + ex.Message);
  }
}
Basically we’re just wrapping a try/catch block with a retry loop. Nothing incredibly difficult but a lot of extra code to write around every bit of code that interacts with the network.
To make our lives a lot easier, we can leverage the fact that most of the methods that interact with the network in Xamarin/.NET are asynchronous methods that return Task<T> values. This allows us to create a reusable solution with a helper method that accepts a Func<Task<T>> and returns a Task<T>. That helper method handles all of the details of automatically re-executing the call in the event of a failure.
Such a method would allow us to have our network-based work automatically retried just by writing the following…
var byteArray = await TaskHelper.RunWithRetry(() =>
  { return new HttpClient().GetByteArrayAsync("https://jwhh.com/HedgeHog.gif"); }
This wraps the work we want to retry in a lambda expression and passes it to the RunWithRetry helper method that encapsulates the retry details.
So now the question is … what does RunWithRetry look like?
The answer to that is the meat of my post today 🙂
Looking at how to create a reusable solution, I find it’s a bit easier to think in terms of working with the Task<T> capabilities directly rather than using the await behavior in the original retry code I wrote above (await kind’a hides some of the Task<T> details).
Using the Task<T> directly, the code to retry the work in the event of failure might look something like this.
byte[] byteArray = null;
HttpClient().GetByteArrayAsync("https://jwhh.com/HedgeHog.gif")
  .ContinueWith(firstTask =>
{
  if(firstTask.IsFaulted)
  {
    // First try didn't work, so try again
    HttpClient().GetByteArrayAsync("https://jwhh.com/HedgeHog.gif")
     .ContinueWith(secondTask =>
    {
      if(secondTask.IsFaulted)
      {
        // Second try didn't work either
        // Log error and give up
      }
      else
      {
        // Success on second try
        byteArray = secondTask.Result;
      }
    }
  else
  {
    // Success on first try
    byteArray = firstTask.Result;
  }
}
Now that code is even more complicated than the first bit I wrote but we’re beginning to see an opportunity for reusability. Using the Task<T> directly we’re able to determine that the process failed without a try/catch block and could then just repeat the same work we had tried earlier.
We can do some things that makes it reasonably easy to create a reusable solution:
Our solution will be composed of two methods. The first is the one that we will call from within our app code.
public static Task<T> RunWithRetry<T>(Func<Task<T>> func, int maxTries = 3)
{
  return RunWithRetryInternal(func, maxTries - 1,
    new TaskCompletionSource<T>(), Enumerable.Empty<Exception>());
}
This method accepts the function to execute (func) and the number of times to try (maxTries) with a default of 3. The job of this method is to setup the actual work of trying the “func” and pass that into another method that will handle the details.
Here’s the function that handles the details.
private static Task<T> RunWithRetryInternal<T>(
  Func<Task<T>> func, int remainingTries,
  TaskCompletionSource<T> tcs,
  IEnumerable<Exception> previousExceptions)
{
  func().ContinueWith(previousTask =>
  {
    if (previousTask.IsFaulted)
    {
      var exceptions = previousExceptions.Concat(
        previousTask.Exception.Flatten().InnerExceptions);
      if (remainingTries > 0)
        RunWithRetryInternal(func, remainingTries - 1,
          tcs, exceptions);
      else
        tcs.SetException(exceptions);
    }
    else
      tcs.SetResult(previousTask.Result);
  }, TaskContinuationOptions.ExecuteSynchronously);
  return tcs.Task;
}
This method executes the actual work and then checks to see how things went. If the work encountered an error, the function adds the exceptions to a collection and retries the work by recursively calling itself as long as the max number of tries has not been reached. If the max number of tries is reached, then we associate the exceptions with our TaskCompletionSource and exit (the TaskCompletionSource makes us look like a regular task completion to the caller).
If the work does complete successfully (on any of the tries) we then indicate success through the TaskCompletionSource.
Admittedly that code might be a bit to grock at first but we’re basically just creating a generic way to retry Task-based operations. And once we have that method in place, the code you have to write is pretty simple (this is the RunWithRetry call I showed earlier).
var byteArray = await TaskHelper.RunWithRetry(() =>
  { return new HttpClient().GetByteArrayAsync("https://jwhh.com/HedgeHog.gif"); }
More importantly, you’ll find that your application support life gets a lot simpler.
At Spectafy, we experienced a significant drop in the number of network-based errors that we’re reported to the program by adding this type of retry code. This, in turn, creates a far more stable app, happier users, and simpler app support life.
We’ve been talking about Instruction Overlays (or what we at Spectafy call instructables) over several posts (adding instructables and instructable exit animation) this week. Let’s wrap up the week with one more point about showing instructables on Xamarin Android (next week we’ll look at Xamarin iOS).
So far, for simplicity, we’ve be showing our instructable as a single image file. Although simple, this approach runs into issues due to screen sizes differences with Android devices.
Here’s our instructable on a screen of the desired size (looks good)…
And here it is on a device with a wider screen (not so good — doesn’t cover the right edge)…

One thought is that we might scale or stretch the image but doing so would distort the instructable which we don’t want. It’s important for instructables to be clear and engaging so that our users will want to read them.
Given the wide variety of screen sizes across Android devices, creating a separate image for each screen size would be virtually impossible .. so what do we do?
What we need to do is separate the content of the instructable (the images, words, etc.) from the background. With that, we can keep the content a fixed size, adjust the content positioning, and adjust the background to cover the whole screen.
In the case of the instructable we’ve been looking at this week, we’re now going to need 3 parts.
For #1 & #2, you’ll need to head back to your graphics person and have them create those images with fully transparent backgrounds. This is also a good time to take a close look at the instructable and see if you might want to make any improvements [ you’re re-doing the graphics anyway 🙂 ].
Here’s our new graphics files … they won’t show well here but if you download them and take a look against a dark background, you’ll be able to see them better.
Graphic #1

Graphic #2
![]()
For #3, we can take advantage of Android’s drawable resources. In the drawable folder under the Resources folder, create a file called instructional_background.xml that contains the following…
<?xml version="1.0" encoding="utf-8" ?>
<shape
  android:shape="rectangle"
  xmlns:android="http://schemas.android.com/apk/res/android">
    <solid android:color="#CC000000"/>
</shape>
This file describes a rectangle with a solid fill color of black (000000) that is 80% opaque (CC). The rectangle will draw at whatever size it needs to be.
To create our new screen-size-variation-friendly instructable, we replace the ImageView we created earlier with the following layout description. (In other words, this layout now becomes the last element under the FrameView and you delete the ImageView that was there previously.)
<RelativeLayout
  android:id="@+id/layoutInstructionOverlay"
  android:layout_width="match_parent"
  android:layout_height="match_parent"
  android:visibility="gone"
  android:background="@drawable/instructional_background">

    <!-- Graphic #1 -->
    <ImageView
      android:src="@drawable/map_coaching_main"
      android:layout_width="wrap_content"
      android:layout_height="wrap_content"
      android:id="@+id/imageCoachingMain"
      android:layout_centerInParent="true" />

    <!-- Graphic #2 -->
    <ImageView
      android:src="@drawable/taptodismiss"
      android:layout_width="wrap_content"
      android:layout_height="wrap_content"
      android:id="@+id/imageTapToDismiss"
      android:layout_alignParentBottom="true"
      android:layout_centerHorizontal="true"
      android:layout_marginBottom="10dp" />
</RelativeLayout>
The RelativeLayout element is set to fill the entire screen and has specified our instructional_background drawable as its background. This will give us an 80% opaque black background that fills the screen across all screen sizes and won’t distort.
We’ve then set the main graphic (map_coaching_main) to be centered on the screen.
And finally, our “tap to dismiss” graphic is placed just above the bottom edge of the screen, centered horizontally.
And voila .. we have an instructable that looks good across all screen sizes.
Here’s the narrow-screen device (looking good)…

And the wider-screen device (still looking good)…

We have one other small change to make … We need to be sure that the exit animation we added is applied to the RelativeLayout containing the instructable instead of that single image file we we’re using before.
All we need to do is change the line that did the FindViewById on the ImageView to find the RelativeLayout.
var imageCoachingOverlay = FindViewById<ViewGroup>(Resource.Id.layoutInstructionOverlay);
The animation will now be applied to the RelativeLayout and it’s contents.
And with that .. we have a pretty rockin’ instructable that works across the various screen sizes.
This wraps up our Xamarin.Android discussion of instructables for a bit. Next week we’ll see how to show instructables on Xamarin iOS.
In my last post we talked about adding an instruction overlay (instructables as we call them at Spectafy) to your Xamarin Android app. One way we can improve our instructable is to add animation to the way it exits.
As a reminder, here’s the code we use to dismiss the instructable.
var imageCoachingOverlay = FindViewById<ImageView>(Resource.Id.imageCoachingOverlay);
imageCoachingOverlay.Touch += delegate(object sender, View.TouchEventArgs e)
{
  e.Handled = true;
  imageCoachingOverlay.Visibility = ViewStates.Gone;
 };
Basically we just set the instructable’s visibility to gone which causes it to disappear instantly. We can give the instructable a much more professional look by adding a simple animation that causes the instructable to slide off of the screen.
Adding that effect is as easy as adding 2 lines of code and an animation resource file. Let’s start with the resource file.
Before we can create the animation resource file we need to create an anim folder under our Resources folder (right-click on Resources in the Solution Explorer and choose Add/New Folder).

Now create a new XML file in the anim folder named left_and_out.xml…
The file should now appear in the Solution Explorer…

In the left_and_out.xml file we describe the animation.
<?xml version="1.0" encoding="utf-8" ?>
<set xmlns:android="http://schemas.android.com/apk/res/android">
  <translate android:fromXDelta="0%p" android:toXDelta="-100%p"
   android:fillAfter="true" android:duration="500"/>
</set>
In this animation we’re telling Android that we want to translate the X position of the View from it’s current position (0%) to a negative 100% (slide it all of the way left); the animation will take 500 milliseconds to execute.
That XML file takes care of all of the hard work.
To perform the animation, all we have to do is load the animation resource and start it.
imageCoachingOverlay.Touch += delegate(object sender, View.TouchEventArgs e)
{
  var leftAndOut = AnimationUtils.LoadAnimation(this, Resource.Animation.left_and_out);
  imageCoachingOverlay.StartAnimation(leftAndOut);

  e.Handled = true;
  imageCoachingOverlay.Visibility = ViewStates.Gone;
};
And now … instead of just disappearing … the instructable slides nicely off to the left.
For an app to be successful you have to be sure your users know what they’re supposed to do in the app. This is where instruction overlays come in (or Instructables as we call them at Spectafy). With an instructable you can overlay specific instructions right on top of the screen just as the user is about to use it. You tell your users exactly what they need to know when they need to know it.
Including instructables in your app is much easier than you might think. Over the next few posts I’ll go over a number of techniques for showing instructables using Xamarin on both Android and iOS.
Let’s start with a basic screen overlay on Android.
The first step is for you or your graphics person [ in my case it definitely needs to be the graphics person 🙂 ] to create the overlay. Be sure that the graphic is semi transparent so that the user can see that the instructable is overlaying the app’s regular screen. Something like this…

Although you can dynamically add the overlay to your screen, the easiest thing to do is simply include the overlay in the screen’s layout resource. Let’s assume that we have an existing layout resource similar to the following…
<LinearLayout
  xmlns:android="http://schemas.android.com/apk/res/android"
  android:layout_width="match_parent"
  android:layout_width="match_parent">

    <!-- Your screen's layout details -->

</LinearLayout>
Note: I happen to be using a LinearLayout in the above example but this technique will work with pretty much any layout.
To include the overlay, we wrap the existing layout in a FrameLayout and add an ImageView referencing the overlay as the last element of the FrameLayout.
<FrameLayout
  xmlns:android="http://schemas.android.com/apk/res/android"
  android:layout_width="match_parent"
  android:layout_height="match_parent">

    <!-- Start of the existing layout -->
    <LinearLayout
      android:layout_width="match_parent"
      android:layout_height="match_parent">
        <!-- Your screen's layout details -->
   </LinearLayout>
   <!-- End of the existing layout -->

   <ImageView
     android:src="@drawable/coachingmark"
     android:layout_width="wrap_content"
     android:layout_height="wrap_content"
     android:visibility="gone"
     android:id="@+id/imageCoachingOverlay" />
</FrameLayout>
Two important things to remember…
With the instructable in the layout resource we just need to show it and give the user a way to dismiss it.
In most cases you’ll want the instructable to appear the first time the user visits the screen. You can track a user’s first visit to a screen in a number of ways. The technique I generally use is to store a value in shared preferences (Context.GetSharedPreferences).
When the screen launches I check that value and make the instructable visible if this is the user’s first visit.
var imageCoachingOverlay = FindViewById<ImageView>(Resource.Id.imageCoachingOverlay);
imageCoachingOverlay.Visibility = ViewStates.Visible;
The last step is to setup a simple touch handler to dismiss it.
imageCoachingOverlay.Touch += delegate(object sender, View.TouchEventArgs e)
{
  e.Handled = true;
  imageCoachingOverlay.Visibility = ViewStates.Gone;
 };
When you run the app, the screen will appear similar to the following …
… once the user sees the instructable, they simply tap on it and it’s gone.

And that’s it … you now have an instructable (Instruction Overlay) in your screen.
We’ll explore the idea of instructables in a number of future posts. We’ll talk about adding animations to dismiss the instructable, dealing with screen size variations, etc. … and how to do all of that stuff on iOS.
Believe it or not, in celebration of their 10th Anniversary Packt Publishing is making the e-version of my book available for only $10.

Well actually they’re doing it for all of their e-books and videos.
 This opportunity runs through July 5th, 2014 .. Don’t miss it!!
If you’re looking to get started understanding Xamarin, checkout this Free Webcast on Xamarin that I just did for Pluralsight.
If you’d like to a little deeper in Xamarin, checkout my Pluralsight courses on Xamarin…
Keep watching to learn more about Xamarin
Check out my latest article over on Developer.com…
Xamarin is a powerful toolset that brings the rich programming features of .NET and C# to Android and iOS. With Xamarin you are able to create full-featured Android and iOS applications with a shared code base working within a common programming environment. This is part one of a two-part article that walks you through the complete process of using Xamarin to create a simple cross-platform with .NET and C# that runs on both Android and iOS. In part 1, I’ll introduce Xamarin, walk you through the process of creating a cross-platform code library with Xamarin, and guide you through the creation of the Android implantation of the cross-platform app. In part 2, I’ll cover the creation of the iOS implementation…
