
For an app to be successful you have to be sure your users know what they’re supposed to do in the app. This is where instruction overlays come in (or Instructables as we call them at Spectafy). With an instructable you can overlay specific instructions right on top of the screen just as the user is about to use it. You tell your users exactly what they need to know when they need to know it.
Including instructables in your app is much easier than you might think. Over the next few posts I’ll go over a number of techniques for showing instructables using Xamarin on both Android and iOS.
Let’s start with a basic screen overlay on Android.
The first step is for you or your graphics person [ in my case it definitely needs to be the graphics person 🙂 ] to create the overlay. Be sure that the graphic is semi transparent so that the user can see that the instructable is overlaying the app’s regular screen. Something like this…

Although you can dynamically add the overlay to your screen, the easiest thing to do is simply include the overlay in the screen’s layout resource. Let’s assume that we have an existing layout resource similar to the following…
<LinearLayout
  xmlns:android="http://schemas.android.com/apk/res/android"
  android:layout_width="match_parent"
  android:layout_width="match_parent">

    <!-- Your screen's layout details -->

</LinearLayout>
Note: I happen to be using a LinearLayout in the above example but this technique will work with pretty much any layout.
To include the overlay, we wrap the existing layout in a FrameLayout and add an ImageView referencing the overlay as the last element of the FrameLayout.
<FrameLayout
  xmlns:android="http://schemas.android.com/apk/res/android"
  android:layout_width="match_parent"
  android:layout_height="match_parent">

    <!-- Start of the existing layout -->
    <LinearLayout
      android:layout_width="match_parent"
      android:layout_height="match_parent">
        <!-- Your screen's layout details -->
   </LinearLayout>
   <!-- End of the existing layout -->

   <ImageView
     android:src="@drawable/coachingmark"
     android:layout_width="wrap_content"
     android:layout_height="wrap_content"
     android:visibility="gone"
     android:id="@+id/imageCoachingOverlay" />
</FrameLayout>
Two important things to remember…
- The ImageView needs to be the last element under the FrameLayout so that its at the top of the z-order and therefore appears in front of the other content
- The ImageView visibility is set to “gone” so that it doesn’t normally appear in the screen layout
With the instructable in the layout resource we just need to show it and give the user a way to dismiss it.
In most cases you’ll want the instructable to appear the first time the user visits the screen. You can track a user’s first visit to a screen in a number of ways. The technique I generally use is to store a value in shared preferences (Context.GetSharedPreferences).
When the screen launches I check that value and make the instructable visible if this is the user’s first visit.
var imageCoachingOverlay = FindViewById<ImageView>(Resource.Id.imageCoachingOverlay);
imageCoachingOverlay.Visibility = ViewStates.Visible;
The last step is to setup a simple touch handler to dismiss it.
imageCoachingOverlay.Touch += delegate(object sender, View.TouchEventArgs e)
{
  e.Handled = true;
  imageCoachingOverlay.Visibility = ViewStates.Gone;
 };
When you run the app, the screen will appear similar to the following …
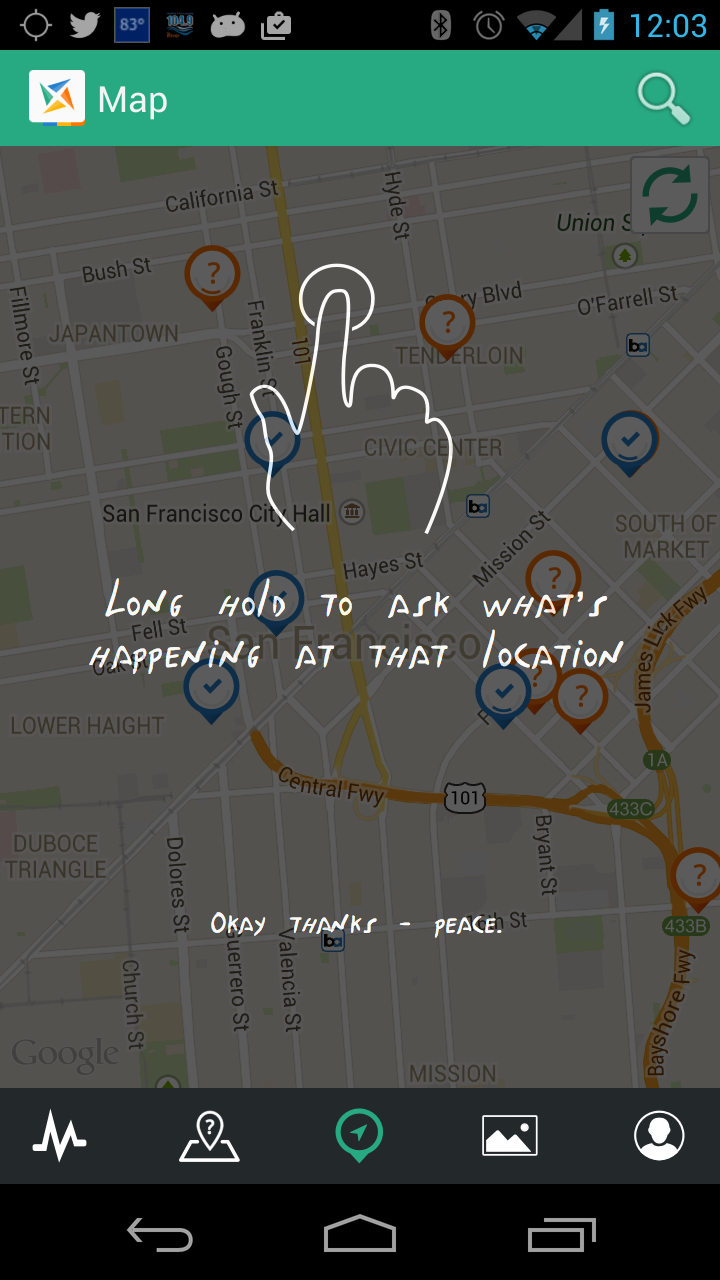
… once the user sees the instructable, they simply tap on it and it’s gone.

And that’s it … you now have an instructable (Instruction Overlay) in your screen.
We’ll explore the idea of instructables in a number of future posts. We’ll talk about adding animations to dismiss the instructable, dealing with screen size variations, etc. … and how to do all of that stuff on iOS.

Hey Jim, just wanted you to know that this post will be in the http://www.XamarinWeekly.com newsletter issue #13. The newsletter comes out on Friday the 8th.
Thanks Adam … that’s great!
[…] talking about Instruction Overlays (or what we at Spectafy call instructables) over several posts (adding instructables and instructable exit animation) this week. Let’s wrap up the week with one more point about […]
could this work in xamarin forms pcl? I cant see a reference to a framelayout in forms. If not do you think it could be done with a custom renderer? Many thanks.
I do something similar in iOS where I dynamically attach the overlay (which I’ll talk about next week) so it’s certainly achievable in Xam.Forms. Let me take a look at things and I’ll get together a post on doing it in Xam Forms.